LOD-ing in OpenSCAD
Categories:
The burden of complex assemblies in OpenSCAD
Nothing quite kills a workflow like having to wait 3s for your rendering to update every time you want to pan the viewport around your work. OpenSCAD’s Boolean geometry functions are great for rapid prototyping; however, building complex assemblies without optimization will quickly sink the framerate and refresh time of the preview window.
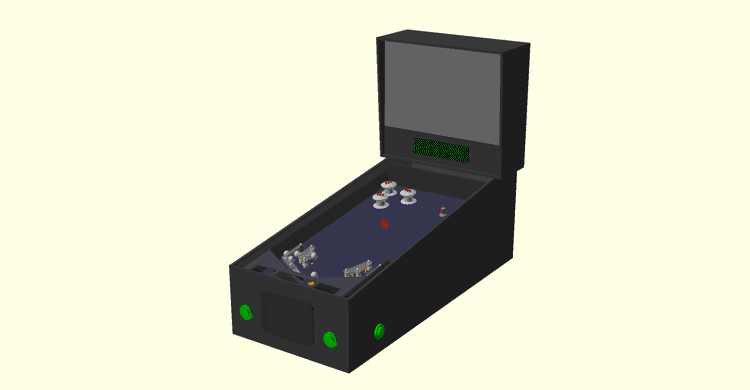
3 seconds wasn't an exaggeration. That's actually how long it takes to pan around my half-scale pinball assembly in the preview at full detail.
For especially complex models, each little detail is stealing away your precious performance. Chances are most details don’t even matter when you’re viewing the assembly as a whole; unfortunately, you can’t just outright remove the details because you do need them at some point.
OpenSCAD does provide a few built-in mechanisms to combat this problem and I’ll outline them below; however, I’ve found the built-in solutions aren’t always sufficient and have created one of my own I’d also like to share.
Reducing curve detail
OpenSCAD has no concept of true curves so the surfaces of circles, cylinders, and spheres are actually composed of many small straight line segments. As you add more “curved” surfaces to your model, the number of polygons being rendered increases dramatically; furthermore, Boolean operations performed on curved surfaces can really drag down performance due to the number of calculations involved. Thankfully, OpenSCAD does provide a mechanism to reduce the complexity of curves.
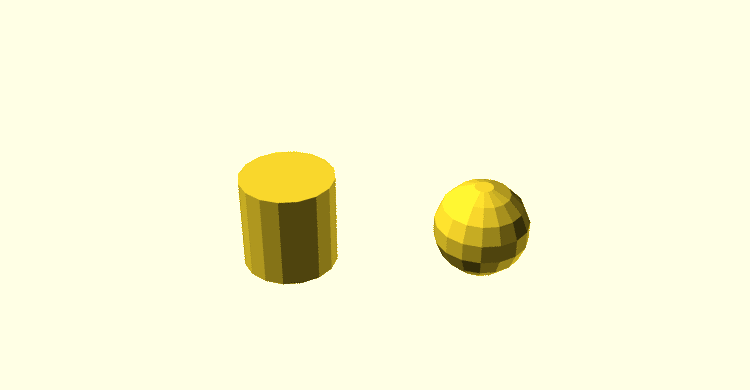
Examples of curved surfaces in OpenSCAD
The $fa, $fs, and $fn special variables control the number of line segments used to represent curves. The usage of these variables is a bit beyond the scope of this post but suffice to say $fa and $fs together provide granular control of curve detail while $fn can alternatively be used to control the detail but with much less granularity (and typically less performance gain).

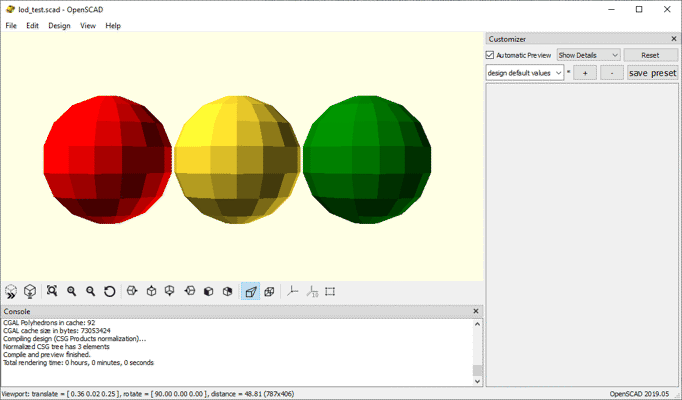
Examples of spheres with different $fa and $fs values. From left to right: 0.01/0.01, 1/1, 5/5
You can define the values of these special variables in code but I find it far more useful to define them globally and make use of OpenSCAD’s customizer feature so they can be tweaked in the editor.
/* [Preview Options] */

// The minimum angle of a curve fragments
$fa = 12; // [0.1:0.1:12]

// The minimum size of a curve fragment
$fs = 2; // [0.1:0.1:2]

sphere(d = 10);
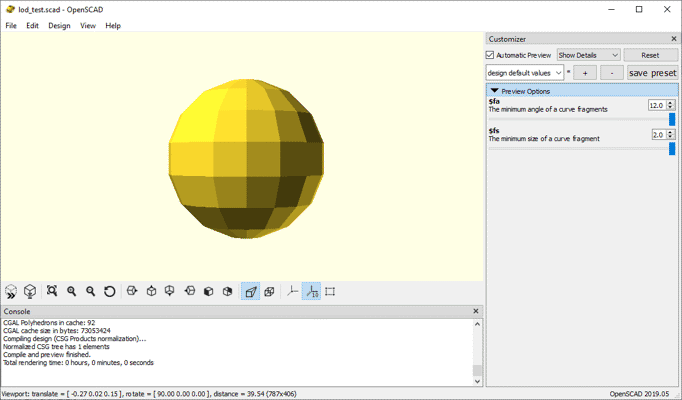
The result of the code snippet above
Overall, this approach works great for reducing the detail of models with many curved parts but it doesn’t help at all for other parts nor does it inherently allow for part-specific granularity.
Forced rendering
If you’ve ever worked with a complex part you’ve probably noticed that camera controls are much faster after rendering; however, rendering your entire scene after each change can take a while. In cases like these, OpenSCAD provides the render() module which allows you to force rendering of part of a model while still viewing the rest in preview mode. This comes with the tradeoff of increased preview refresh time but can greatly reduce slowdown of camera controls once refreshed.
translate([-10, 0, 0]) color("red") sphere(d = 10);
render() color("blue") sphere(d = 10);
translate([10, 0, 0]) color("green") render() sphere(d = 10);
Notice how the middle sphere is yellow instead of blue but the green sphere is not. Any color applied before rendering will be reset but colors applied after will be preserved.
This technique is especially helpful in cases where you have one complex part that is reused multiple times in your assembly. Wrapping that part’s code in a render() module can greatly improve performance depending on how many copies are present. For example, the code below sees a 50% improvement in preview time when uncommenting the render lines but the improvement is negligible when there is only one copy of the complex part.
translate([10, 0, 0]) complex_part();
translate([0, 0, 0]) complex_part();
translate([-10, 0, 0]) complex_part();

module complex_part() {
  //render() {
    sphere(d = 10, $fa = 0.01, $fs = 0.01);
  //}
}
This technique can dramatically improve viewport responsiveness but it must be used sparingly to not significantly hurt refresh times. Wouldn’t it be great if there was a general-purpose solution to reduce the complexity of parts but without hurting the loading time?
LOD-ing
Many games and 3D applications utilize one or more “LOD”-ing techniques to improve performance of real-time rendering. The term LOD simply refers to any technique to dynamically change the level of detail in a 3D scene. Many implementations exist for this purpose but one of the most common is to simply replace complex models with lower detail variants when the user would not notice the difference. For example, many games may swap character models out for versions with fewer polygons when far from the camera as the details afforded by the extra geometry can’t be seen at that distance anyways.
OpenSCAD doesn’t inherently provide a LOD-ing mechanism but it’s easy to implement your own through the use of custom operator modules:
function min_lod() = 0;
function max_lod() = 1;

function clamp(value, min, max) = min(max(value, min), max);
function in_closed_range(value, min, max) = value >= min && value <= max;

module with_lod(lod) {
  $lod = lod;

  children();
}

module when_lod(min, max = max_lod()) {
  effective_level_of_detail = is_undef($lod) ? max_lod() : $lod;
  clamped_min = clamp(min, min_lod(), max_lod());
  clamped_max = clamp(max, clamped_min, max_lod());

  if (in_closed_range(effective_level_of_detail, clamped_min, clamped_max)) {
    children();
  }
}
There’s a bit to take in here so let’s break it down one step at a time.
- In my implementation, the desired level of detail for a part is given as a fraction between 0 and 1 with 0 being least detail and 1 being the most (aka the LOD level). The
min_lod()andmax_lod()functions simply define this range. - The
clamp(value, min, max)helper function limits the providedvalueto a number betweenminandmax(inclusive). - Similarly, the
in_closed_range(value, min, max)function returns true only whenvalueis betweenminandmax(inclusive). - The
with_lod(lod)module sets the fractional LOD all child objects shall be rendered with.- The special variable
$lodis set so that all child objects inherit the current LOD level without needing parameters for it.
- The special variable
when_lod(min, max)acts as a conditional block which only renders its children when the current LOD level is between the provided min and max.- If
$lodhas been defined by a call towith_lod(lod)then we fetch its value; otherwise, we assume the maximum LOD level is desired. - We next perform some input sanitization to ensure the provided minimum LOD level value is between 0 and 1 and that the maximum LOD level is between the minimum and 1.
- Finally, we only render our child objects if the current LOD level is between the desired minimum and maximum.
- If
Using these modules, I can choose which details are hidden at different LOD levels or even replace an entire component with a lower-poly version. For example, the following module defines a solenoid assembly whose frame is replaced with a plain cube at lower LOD levels:
module t_tulead_solenoid_add06190484(stroke = 0, plunger_angle = 0) {
  // ...

  when_lod(min = 0.75) {
    t_tulead_solenoid_add06190484_frame();
    translate([0, 0, -body_length + wall_thickness]) {
      t_tulead_solenoid_add06190484_coil();
    }
  }

  when_lod(min = 0, max = 0.75) {
    t_tulead_solenoid_add06190484_simplified_frame();
  }

  rotate([0, 0, plunger_angle]) {
    translate([0, 0, plunger_position]) {
      t_tulead_solenoid_add06190484_plunger_assembly();
    }
  }
}
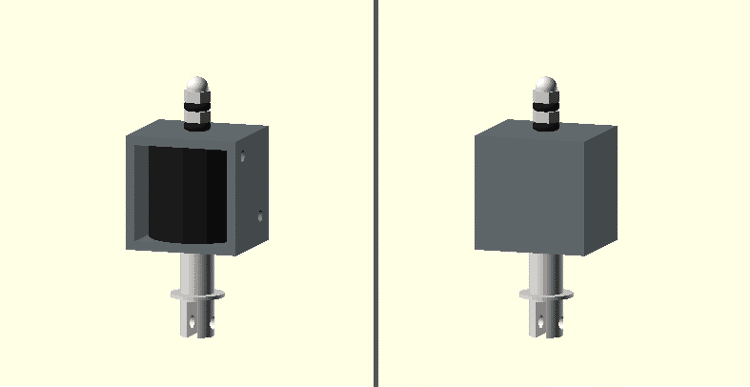
left: the max detail of the model, right: the same model with a lower LoD
While it may not seem like a major difference now, removing a few extra details here and there can have a big impact of preview performance especially for frequently used parts.