Half Scale Pinball
Projects:
Background
Since 2015, I’ve been working to build a roughly half-scale pinball machine themed after the original System Shock. I got the idea from the various mini-pinball machines built on the Ben Heck Show [1] [2] and from having finished playing the original System Shock around the same time. This whole idea started when I noticed the serv-bots on the medical level closely resembled pinball pop-bumpers. From there, I began to think about how many of the objectives and mechanics in the game could be adapted to modes in a pinball machine.
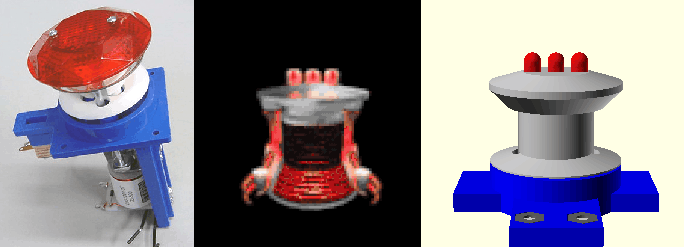
Pop bumper and Serv-Bot together at last
While the project is far from complete, I’ve decided to start blogging my progress to help anyone else in the community wanting to build their own scaled down pinball machine. The world needs more mini-pinball!
Objectives
From the start, I knew my machine had to be fully featured. To me that means, all of the following mechanisms must be present and they must work more-or-less the same as those found on full sized machines:
- Auto-plunger
- Backglass
- Coin-mech (that only accepts dimes)
- Dot Matrix Display
- Drop Targets
- In/out Lanes
- Kick-out Hole
- Light Strips
- Multiball
- Playfield Inserts
- Pop Bumpers
- Rollovers
- Skill Shots
- Slingshots
- Spinners
- Tilt Sensor
I don’t know how feasible all of these features are but I strive to at least try each one. Additionally, I have a few general goals I’d like to achieve for my own peace of mind:
- Minimal high-voltage wiring
- Consumable components are easily replaceable
- All playfield mechs are designed to be reusable in other games
- Minimal custom PCBs
- Use as many original game assets as possible
- Avoid servos (I just really hate that high-pitch sound they make)
I have a few special features I’m designing in as well but you’ll just have to stay tuned to future posts to hear about those.
Challenges
One of the first and most persistent challenges of building a scaled down pinball machine is the OG buzzkill, physics. As Ben noted in his show, simply scaling down the ball’s diameter by half doesn’t really work all that well as you lose so much mass that the ball becomes uncontrollable. Taking Ben’s advice, I have chosen to use a 5/8" bearing ball as opposed to a 1/2" ball.
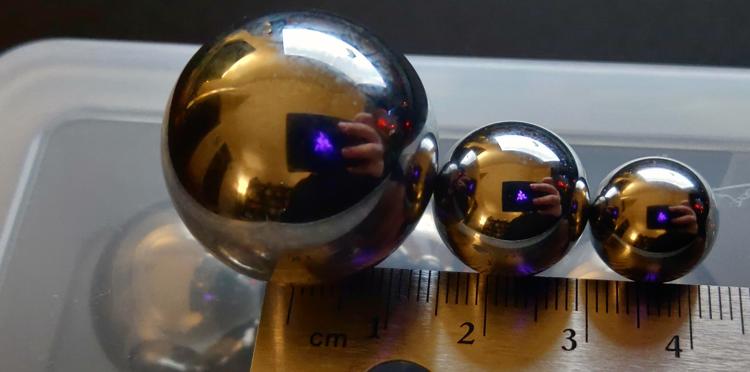
From left to right: 1 1/16" (~27mm), 5/8" (~15.87mm), and 1/2" (~12.7mm) bearing balls
Even with the adjusted diameter, the 5/8" ball just doesn’t have enough mass to actuate most switches. As an experiment, I tried resting one of the mini pinballs on a Cherry MX Speed switch and to my horror it didn’t even begin to depress the switch. As others have demonstrated in their own scaled pinball projects, this limitation does have workarounds but it requires some creative use of alternative sensor types (eg capacitive, infra-red, inductive, etc.).

Sensors I've tested thus far including capacitive, inductive, optical, Hall effect, physical, and ultrasonic
Physics isn’t the only problem we’ve got to contend with either. Finding solenoids with enough power and throw to actuate the playfield mechs has been far more difficult than I initially expected. Most higher power and longer throw solenoids are simply too big to fit into a half-scale cabinet and smaller solenoids lack the power or range needed to do anything useful. Thankfully, I’ve found this can be mitigated by overvolting smaller solenoids; although, only time will tell how long the solenoids last being driven at 150-160% their rated voltage.
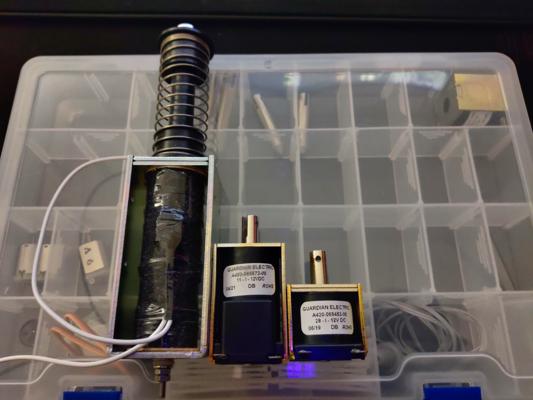
Pictured above are 3 vastly different sizes of 12v solenoids
Development
I personally prefer to work in CAD before making anything physical. I realize this is completely backwards from nearly everyone else; however, I find I just can’t picture the end result I want without drawing it out in CAD first. In a twist that’s sure to surprise some, my CAD tool of choice OpenSCAD. The reason for this is twofold: 1) OpenSCAD’s language really meshes with how I think (pun intended) and 2) Fusion 360 is borked for my Autodesk account and I refuse to make a new account just to fix their software.
In all seriousness, I have used Autodesk 3D modelling and CAD software in the past but being a software engineer by trade I just feel more comfortable writing code. That said, OpenSCAD leaves a lot to be desired (especially in the dependency management front) and I probably would have been a lot farther along by now had I forced myself to use something else. All that’s to say: your mileage may vary.
Current Progress
Unsurprisingly, that laundry list of features, challenges, and my odd choice in toolchains hasn’t resulted in the progress you’d expect to see after 7 years; however, that’s not to say I’ve been slacking either. I’ve made great strides in improving my development workflow with OpenSCAD libraries, tested numerous mech prototypes and sensors, and produced working assemblies for the flippers, slingshots, and drop targets. The screenshots below are renderings of some of the current progress and there will be more to come in future posts.
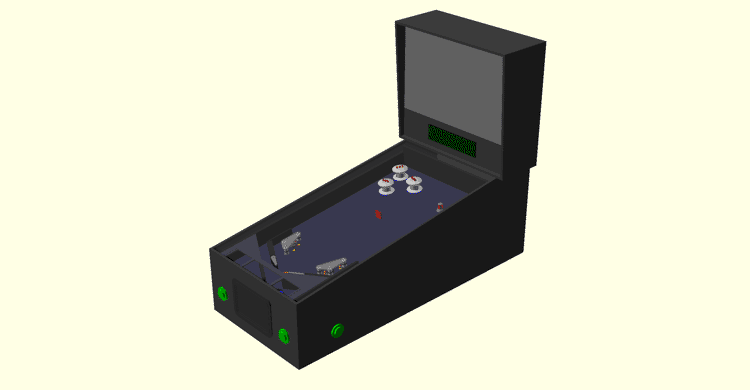
A look at all the designed parts in a mockup cabinet
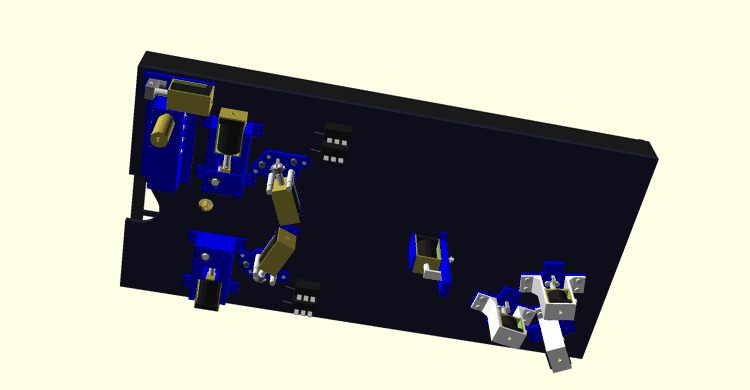
The current underside of the playfield
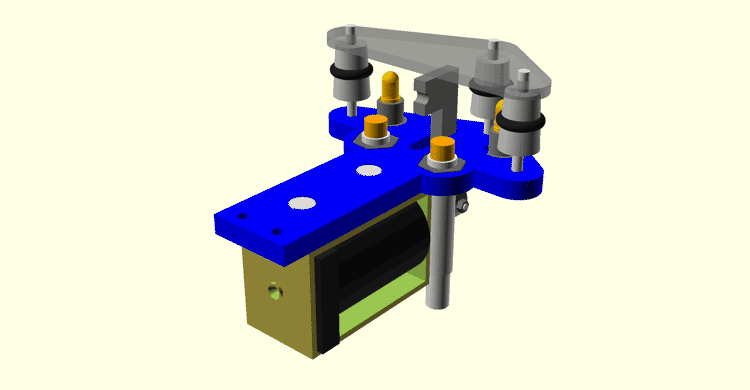
Closeup of the slingshot assembly without the playfield (rubber ring not shown)
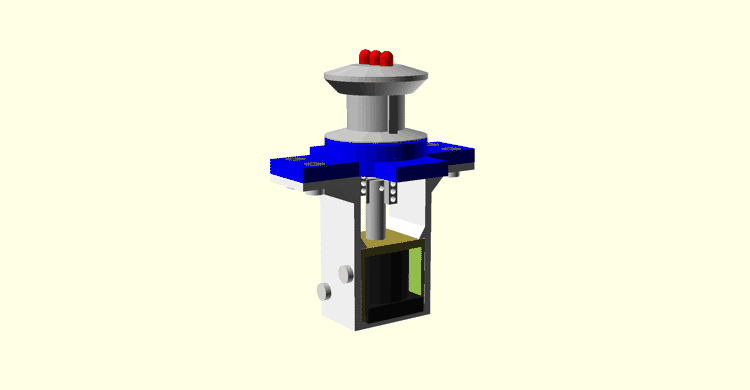
Closeup of the WIP pop bumper assembly
Wrap-up
That’s all I’ve got time to write about for now but be sure to subscribe to my RSS feed so you get notified of my future progress. In the short-term, I’m planning in-depth posts on the mechs built thus far and the challenges I faced designing them.